Support page

The process of pairing your Philips Home Security Cameras should approximately take 2-3 minutes
1. Press the reset button for 5 seconds.
2. Make sure you hear a prompt
3. LED should go to steady red
4. Wait until you hear a prompt again, and the camera starts blinking red.
5. The camera is now in pairing mode.
Minimum requirements :
Indoor 1000 series: 1.2Mbps, 2.4 GHz
Indoor 3000 series: 1.5Mbps, 2.4 GHz
Outdoor 3000 series: 1.2Mbps, 2.4 GHz
-
If you don't see a 2.4 GHz network available, you may need to divide your network into dual-band. At this point, we recommend calling your network provider for assistance.
-
If you want to try dividing your network yourself, you'll need to log into the web interface of your router. The login information for routers provided can vary depending on the brand and model of the router.
-
Keep in mind that your login information may have been changed from the default by your internet provider or by you. If you are unable to log in with the above information, check the router's user manual or contact your internet provider for assistance.
If none of these steps work for you, please contact our customer support for further assistance.
Intro:
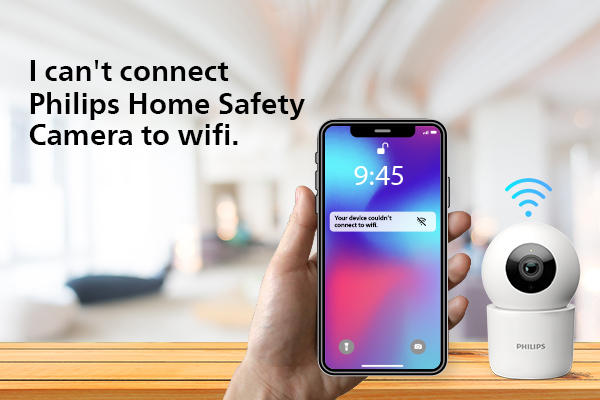
Many routers support “dual band” WiFi,which supports both 2.4 GHz and 5 GHz WiFi frequency bands. The Philips Home Safety camera is only compatible with 2.4 GHz networks. Follow these steps to identify the frequency of your WiFi network.
Check the WiFi network name
1. On a device connected to your WiFi network, open the settings menu.
2. Look for the section that displays WiFi network information.
3. The network name may indicate whether it is a 2.4 GHz or 5 GHz network (e.g., "MyNetwork_2.4GHz" or "MyNetwork_5GHz")
Android phone
Check the frequency band in the settings:
1. Ensure your phone is connected to your WiFi network.
2. Go to "Settings".
3. Go to "Wi-Fi" or "Network and Internet".
4. Find your Wi-Fi network and tap on it.
5. The network details should display the frequency as either 2.4 GHz or 5 GHz.
Please note that steps may vary depending on the brand and model of your Android phone.
iPhone
Unfortunately, iOS does not display WiFi frequency. Check using a Mac or Windows computer or try an alternative method.
Windows computer
Check the frequency band in Wi-Fi properties:
1. Ensure your computer is connected to your WiFi network.
2. Open the networks panel from the taskbar (WiFi icon in the bottom right).
3. Click on ‘’Properties’’ of your connected network.
4. A new window will open, scroll down to the properties section.
5. The network band will either say 2.4 GHz or 5 GHz.
MacBook computer
Check the channel information of your WiFi:
1. Ensure your computer is connected to your WiFi network.
2. Hold down the ‘’option’’ key and click the WiFi icon in the top bar.
3. Look for ‘’Channel’’, this will either say in the brackets 2.4 GHz or 5 GHz.
Alternative options
If you are unable to find the frequency information using the WiFi settings on your device, try one of the following alternatives:
1. Check the user manual or documentation of your WiFi router or modem. It should provide details about the supported frequency bands.
2. Log in to your router's web interface and look for the WiFi settings. There should be an option to switch between the 2.4 GHz and 5 GHz frequency bands and indicate which one is currently selected.
3. Contact your internet service provider for assistance. They can provide information about your network's frequency.
If none of these steps works for you, please contact our customer support for further assistance.
The maximum distance you can place your Philips Home Safety Camera from your router depends on whether it is placed indoors or outdoors. Read our article below for more information.
Indoors
For indoor use, the WiFi range reaches a maximum of 45 meters (approximately 150 feet). Keep in mind that this range can be affected by walls and obstacles within your home.
Outdoors
When used outdoors, the WiFi range extends up to 90 meters (approximately 300feet). However, factors like outdoor obstacles and interference may impact the actual range
Recommended placement
For optimal performance and a stable connection, it is recommended to place your Philips Home Safety Camera within the WiFi range from the router. If your camera is at the edge of the range or experiencing connection issues, consider repositioning the camera or adding a WiFi extender to enhance the signal strength.
Did the above answer your questions? If not contact us for further assistance.
The Philips Home Safety app allows you to save the recorded video/image from your Philips Home Safety Camera to your phone and share it with others from there.
Intro:
With continuous recording, you can have CCTV-style performance with your Philips Home Safety Camera. Find below how to enable continuous recording, how many consecutive days your model can store, and how to watch your recordings.
To find out how many consecutive days your model of Philips Home Safety Camera can record and store with continuous recording, see the overview below
Enabling continuous recording
You can activate continuous recording within a mode by following these steps:
1. Open "Modes" in the app.
2. Tap on edit on the mode you wish to use for continuous recording.
3. Select the camera for continuous recording.
4. Turn on continuous recording
Once this mode is activated, continuous recording will occur for the duration of the mod
Accessing your continuous recordings
To access your continuous recordings, follow these steps:
1. Navigate to the "Events" section.
2. Tap the dropdown menu labelled "Events" at the top left.
3. Choose "Continuous Recordings."
Did the solutions above help? If not contact us for further assistance.
How many days of video can I record?
1000 Indoor series/ 3000 Outdoor series:
For high-resolution video recording throughout the day, approximately 13GB of storage is required. Using a 128GB SD card enables up to 10 consecutive days of continuous recording.
For low-resolution video recording throughout the day, approximately 5.3GB of storage is needed. A 128GB SD card allows for up to 24 consecutive days of continuous recording.
3000 Indoor series:
For high-resolution video recording throughout the day, around 16GB of storage is necessary. Using a 128GB SD card allows for up to 8 consecutive days of continuous recording.
For low-resolution video recording throughout the day, approximately 5.3GB of storage is required. A 128GB SD card enables up to 24 consecutive days of continuous recording.
Note: when the SD card becomes full, your Philips Home Safety Camera will automatically overwrite the oldest recorded footage, ensuring continuous recording without interruption.
You can view, record or respond to what is happening at home, using the Philips Home Safety app. That includes viewing footage saved on the SD card of your camera.To keep your files secured, the SD card is encrypted by default and cannot be read if removed from your camera. We recommend keeping the encryption on.
There are two scenarios in which you can use the app on multiple devices.
Firstly, the app allows you to share access to your cameras with friends and family. This means that the people you shared access with, can access your camera using their accounts.
Additionally, you can download the Philips Home Safety app on multiple devices and log into the same account. This allows you to use the app seamlessly across all your devices, ensuring that you always have access
If your camera detects excessive sound or movement, it will send you a notification. In case you are receiving too many notifications from your Philips Home Safety Camera, read the article for possible causes and solutions.
1. Navigate to the “devices” section.
2. Select the camera whose sensitivity you want to adjust.
3. Access the camera's settings.
4. Adapt the sensitivity levels for sound or movement according to the environment in which the camera is located.
Note:
If none of these steps work for you, please contact our customer support for further assistance.
Adjust sensitivity settings
You can modify the sensitivity settings of your camera by following these steps:
Navigate to the “devices” section.
Tap on ‘’settings’’ of the camera whose sensitivity you want to adjust.
Go to ‘’detection settings’’.
Adapt the sensitivity levels for sound or movement according to the environment in which the camera is locate
Manage notification settings for modes
You can disable notifications completely for specific modes by adjusting the settings:
Navigate to the “modes” section.
Tap on ‘’edit’’ for the mode you want to modify.
Select the camera that you want to adjust.
Disable push notifications for movement, person, and/or sound detection as per your preference.
Tap on ‘’save’’ to apply the changes.
You can access your Philips Home Safety Camera from anywhere, as long as you have internet access. In case you want to use your camera in your new location, unpair it from the app and pair it again with the new WiFi details
You need to unpair the camera from the Philips Home Safety app and then pair it again, using the new WiFi password and/or network. To do so, please follow the next steps:
-
Go to ""Profile""
-
Tap “Home management”
-
Select your “Home” in the section “Connected Devices”
-
Tap on the camera you want to unpair and,
-
Tap on “Unpair device from home” to “Unpair”.
1000 Indoor series/ 3000 Outdoor series:
For high-resolution video recording throughout the day, approximately 13GB of storage is required. Using a 128GB SD card enables up to 10 consecutive days of continuous recording.
For low-resolution video recording throughout the day, approximately 5.3GB of storage is needed. A 128GB SD card allows for up to 24 consecutive days of continuous recording.
1000 Indoor series/ 3000 Outdoor series:
For high-resolution video recording throughout the day, around 16GB of storage is necessary. Using a 128GB SD card allows for up to 8 consecutive days of continuous recording.
For low-resolution video recording throughout the day, approximately 5.3GB of storage is required. A 128GB SD card enables up to 24 consecutive days of continuous recording.
Note: when the SD card becomes full, your Philips Home Safety Camera will automatically overwrite the oldest recorded footage, ensuring continuous recording without interruption.
Yes, you can both share access to your Philips Home Safety Camera with up to 20 users and access the app on multiple devices. Find out how in the article below.
Add users to your home You can add users to your home through the Home Safety app and allow them to access your cameras. Follow the steps below to begin:
1. Go to ‘’Profile’’
2. Tap ‘’Home management’’
3. Select the home you want to share
4. Go to ‘’sharing settings’’
5. Tap ‘’Invite users to home’’
6. Fill out the name and email address of the person you want to share access with.
7. Tap ‘’Share invitation’’ and share the invite how you would like.
Note:
while those who receive the invitation can create a Philips Home Safety account at that point, please ensure they use the same email address as the one in the invitation. The link in the invitation expires in 15 minutes.
Log into the same account on multiple devices
To access your cameras on multiple devices, simply install the Philips Home Safety app on the device you want and log into the same accoun
Intro:There are several storage methods available for saving images and videos captured by your Philips Home Safety Camera. Supported options include micro-SD cards and cloud storage. NAS (Networked Attached Storage) is not supported.
supported storage options
Micro-SD cards: You can use micro-SD cards with a capacity of up to 128GB to securely store footage locally.
Cloud storage: Our Premium Cloud subscription provides secure cloud storage for your camera's images and videos.
Unsupported storage options
NAS (Network-Attached Storage)
Philips Home Safety Cameras are not compatible with NAS.
Philips is proud to be a household brand trusted by millions. We take that trust very seriously and follow strict industry standards to ensure your data stays private and in your control. Some of the ways we do so include:
1. Our installed private cloud is ISO27001 compliant.
2. Encrypting the SD card by default so it cannot be read if someone removes it from the device.
3. We encrypt data at rest so it is accessible only to you.
4. TLS 1.2 is used for any data transmission; depending on your router settings AES 128 is supported (AES 128 is the same encryption used by banks).
5. Biometric authentication to access the app if wished
Intro:
You can connect your Philips Home Safety Camera to one account at a time. If you wish to pair it with a different account, unpair the camera from the current paired account first. Find the steps to unpair, and more solutions in our article below.
Follow these steps to unpair your camera:
1. Open the Philips Home Safety app and go to "Profile."
2. Tap on "Home Management."
3. Select your "Home".
4. Under the "Connected Devices" section, tap on the camera you want to unpair.
5. Tap on "Unpair Device from Home" to unpair.
Section:
Not trying to connect to another account?Please make sure to log in to the Philips Home Safety app using the account you used to pair the camera during the initial setup.
Share access:
Under "Home Management" in your profile, you can share access to your home with friends and family. This allows them to use the camera from their own devices.
While those who receive the invitation can create a Philips Home Safety account at that point, please ensure they use the same email address as the one in the invitation.
Log in to the same account:
Alternatively, you can log in to the Philips Home Safety app on different devices using the same account. This enables you to access the camera from multiple devices seamlessly.
Did the solutions above help? If not contact us for further assistance.
- Make sure you have entered the correct WiFi password. If the password is incorrect, the camera will not be able to connect to the network and you will not be able to scan the QR code.
- Make sure your phone is connected to the same WiFi network as the camera. If your phone is connected to a different network, you will not be able to scan the QR code.
- Check if you are using a 2.4 GHz WiFi network. If you are using a 5GHz network, try switching to a 2.4GHz network and try scanning the QR code again. To find out what WiFi network you have check the section “2.4GHz or 5GHz WiFi network”.
- If you only have a 5GHz network available, you may need to divide your network into dual-band. At this point, we recommend calling your network provider for assistance.
- In all cases, the camera should be in “pairing mode”, meaning the LED is blinking red while trying to read the QR code. If this is not the case, try performing the hard reset and try to pair again.
- If the above steps did not work, try performing a hard reset on the camera and try pairing it again. This will reset the camera to its factory settings and might resolve any issues that were preventing the camera from scanning the QR code. 2.4GHz or 5GHz WiFi network?
If you are unable to define whether your WiFi network is 2.4GHz or 5GHz, please read our troubleshooting advice below: The name of WiFi networks indicates 2.4GHz or 5 GHz.
1. Look for the section that displays your WiFi network information.
2. The name of your WiFi network may include a suffix that indicates whether it is a
4 GHz or 5 GHz network.
3. On a device that is connected to your WiFi network, open the settings menu.
For example, if your network name is ""MyNetwork_2.4GHz"", then it is a 2.4 GHz network. If your network name is ""MyNetwork_5GHz"", then it is a 5 GHz network.
4. The Philips Home Safety Camera can only connect to a 2.4Ghz WiFi network, therefore choose this network to connect the camera. The name of WiFi networks does not indicate 2.4Ghz or 5 GHz.
5. If the name of the WiFi network does not indicate this, we suggest calling your internet provider. If none of these steps work for you, please contact our customer support for further assistance.






.jpg)
.jpg)
.jpg)